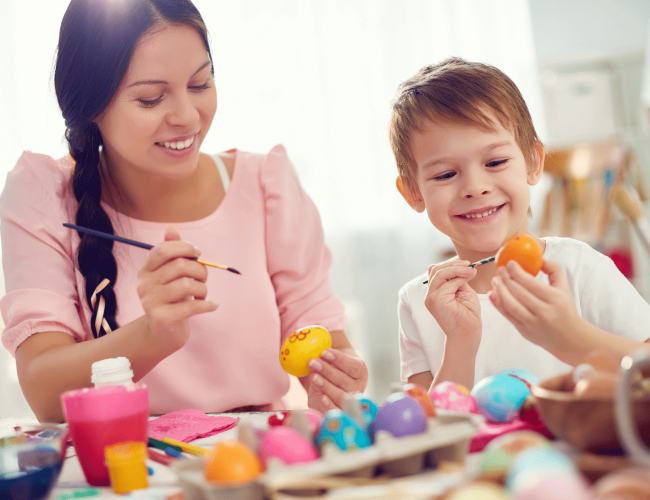
Ideas for a children’s Easter ‘crafternoon’
The key to enjoying craft activities with children is to be organised! Firstly, cover a big table with a wipe-clean cloth and gather together all the items you need for each activity, so they are within close reach. Then make sure the children wear suitable aprons to protect their clothes. Remember to prepare an area that’s ready for clean-up time, so that children can easily access soap and water after the activities. Young children are naturally very keen to get started on craft activities, especially when they catch sight of colourful and tactile resources such as paints, glue, collage materials and scissors. Therefore it’s a good idea for you to be just as fully prepared for any crafting session as the children are to get stuck into it!
Crafting can provide opportunities for children to relax and become more mindful, perhaps after a hectic morning of buzzing around, both mentally and physically. Therefore, the simplest of tasks, with easy instructions are often the most rewarding, so that children can slow down and let their imaginations wander. Activities that involve cutting, sticking, drawing and painting, along with rolling and kneading dough help children develop hand-eye coordination skills and manual dexterity. Language development can also be supported because as the children play with the materials, they often enjoy chatting to an interested adult about their work or any other topics that come to mind. Some children may prefer to remain more taciturn, perhaps because they like to fully focus on the task, and of course, their need for quiet must also be respected.
Some of the following activities might not be suitable for very young children because of a choking hazard from any small parts; however, children of all ages should always receive adult supervision during craft sessions and especially when using sharp tools such as scissors.

Easter Egg Painted Pebbles
Materials required:
- Pebbles (preferably white)
- Acrylic paints
- Paintbrushes of different widths
- Decorative gems
- Ribbon bows
- Pieces of ribbon
- PVA glue
- Glue sticks
- Scissors
Instructions:
- Paint one side of the pebbles in your preferred colours and let them dry, then turn them over and paint the other side. Leave to dry.
- Using a thin paintbrush and your choice of colours, paint horizontal patterns such as zig-zags, wavy lines and straight lines onto one side of the pebbles. Leave to dry. Once dry, paint patterns onto the reverse side if preferred and leave to dry.
- Decorate the pebbles by sticking on little gems, ribbon bows and pieces of ribbon.
- The ‘Easter egg’ pebbles can be used as decoration by arranging them in a shallow dish or place them onto the soil of a plant in a pot.

Bunny and Chick Wooden Spoon Puppets
Materials required:
- Wooden spoons
- Acrylic paint
- Paintbrushes
- Self-adhesive wiggly eyes
- Pieces of felt
- Ribbon bows
- Small, coloured feathers
- Wiggly eyes
- Felt tip pens
- Scissors
- PVA glue
- Glue sticks
Instructions:
- Paint each side of the wooden spoons and leave to dry. You can use traditional colours such as pink for the ‘Easter Bunny’ and yellow for the chick or let the children’s imaginations run wild! Why not a ‘Rainbow-Coloured Easter Bunny’?
- Cut two bunny ear shapes from coloured felt (e.g. pink) and then two slightly smaller bunny ear shapes from a different colour of felt (e.g. white). Glue a smaller ear shape onto each of the larger ear shapes.
- Glue the ears to the back of the bunny spoon.
- Glue on wiggly eyes, a felt triangle-shaped nose and draw the mouth shape using a felt tip pen.
- Glue a ribbon bow onto the neck area of the bunny spoon to represent a bow tie.
- For the chick, glue on wiggly eyes and an orange triangle-shaped nose. Glue some yellow feathers to the back of the wooden spoon.
- Encourage the children to give their spoon puppets ‘voices’ and to make up little stories for mini puppet shows.

Salt Dough Hanging Egg Decorations
Materials:
- Salt dough (made from flour, salt and water)
- Rolling pin
- Egg-shaped cutter
- A straw
- Acrylic paint or paint pens
- Paintbrushes
- PVA glue
- Twine or thin ribbon
Instructions
- Make the salt dough by mixing together 1 cup of flour with ½ cup of salt and ½ cup of water.
- Roll out the dough to the thickness of about 3 mm.
- Cut out egg shapes.
- Place the shapes on a baking tray lined with baking parchment.
- Use the tip of the straw to make a hole in the top of each shape.
- Bake on a low heat for about 2 hours.
- Remove from the oven, allow to cool and then decorate the Easter egg shapes using paint or paint pens. Once one side is dry, paint the reverse side of each shape.
- When the paint is dry, brush over each egg shape with a thin coat of PVA glue. Allow to dry thoroughly on one side before brushing it over the other side.
- Thread twine or ribbon through the hole at the top of each shape ready for hanging on your Easter mini twig tree or to decorate other places of your choice.

